Generate a keystore and alway keep this keystore for update application
If you don’t already have an upload key, which is useful when configuring Play App Signing, you can generate one using Android Studio as follows:
In the menu bar, click Build > Generate Signed Bundle/APK.
In the Generate Signed Bundle or APK dialog, select Android App Bundle or APK and click Next.
Below the field for Key store path, click Create new.
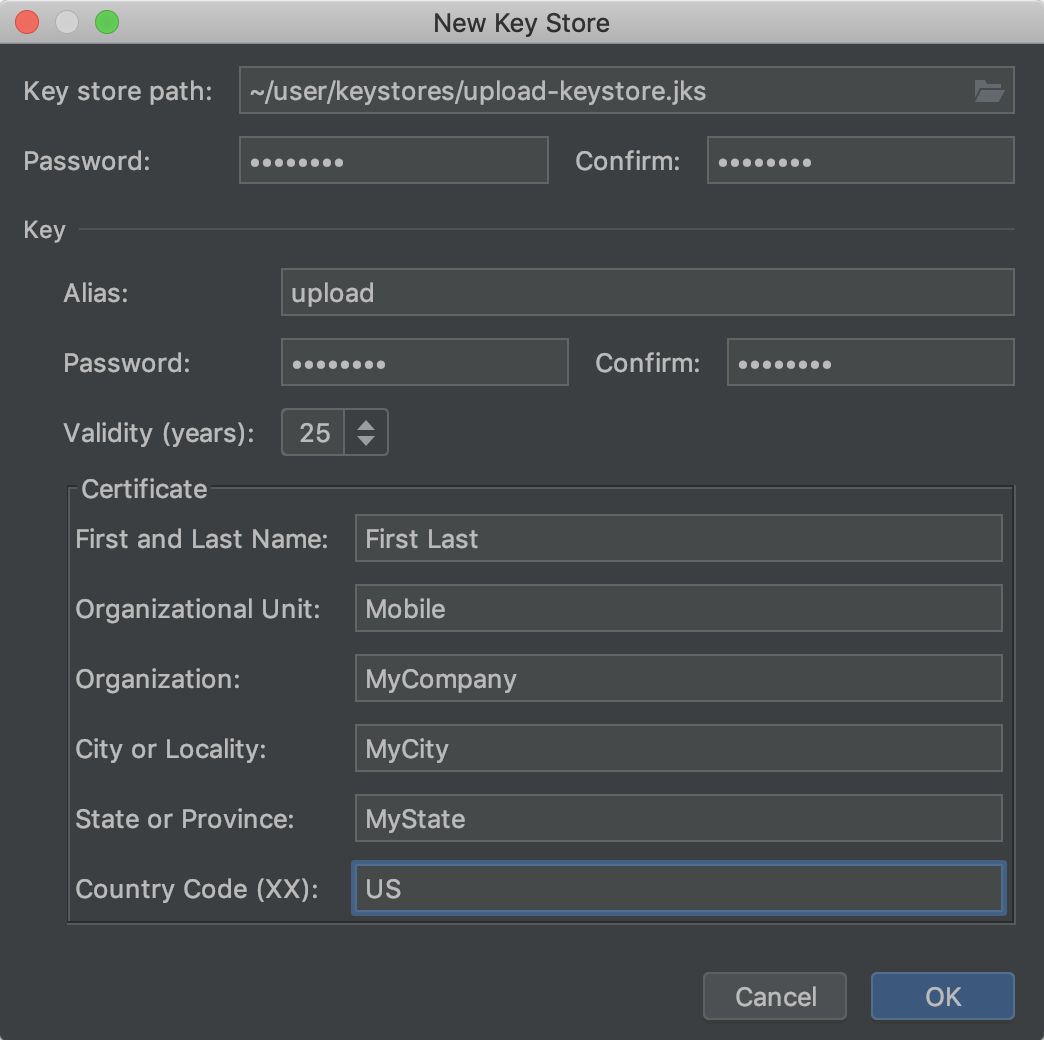
On the New Key Store window, provide the following information for your keystore and key, as shown in figure 2.
Keystore
Key store path: Select the location where your keystore should be created.
Password: Create and confirm a secure password for your keystore.
Key
Alias: Enter an identifying name for your key.
Password: Create and confirm a secure password for your key. This should be different from the password you chose for your keystore.
Validity (years): Set the length of time in years that your key will be valid. Your key should be valid for at least 25 years, so you can sign app updates with the same key through the lifespan of your app.
Certificate: Enter some information about yourself for your certificate. This information is not displayed in your app, but is included in your certificate as part of the APK.
Once you complete the form, click OK.
Figure 2. Create a new upload key and keystore in Android Studio.
Sign your app with your upload key
Check out your source code from git.
Update version code and version name if update app to store.
Open file gradle from rootProject -> android -> app -> build.gradle
Update keystore to build if need
Copy keystore generate to publish application to rootProject -> android folder;
Set password for your keystore in rootProject -> android -> gradle.properties
Open terminal from root project folder your_project %
Setup environment Android Home (Android SDK location) and Java Home (Java SDK location) by command line: