Applies to: Windows 11, Windows 10, and Windows 8. For different system versions, the operation steps may be slightly different.
Understand the limitations of this method. While disabling the automatic update service will temporarily halt any Windows 10 cumulative updates, the service will re-enable itself after a certain amount of time. Here are the directions:
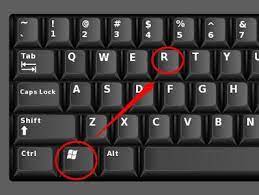
1. Press the Windows logo key + R at the same time to invoke the Run box.
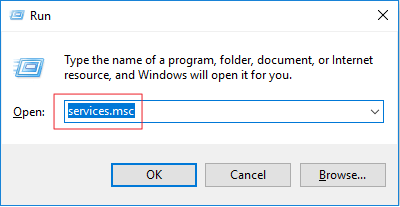
2. Type services.msc and press Enter.
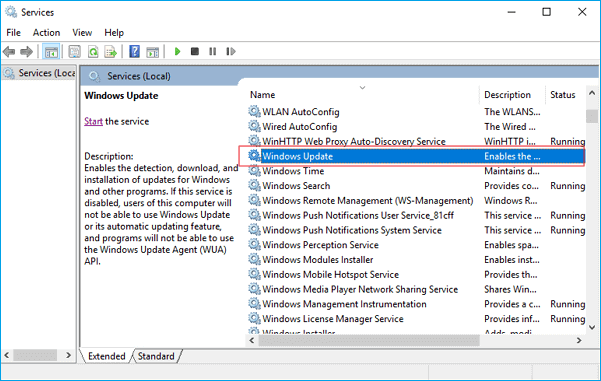
3. Scroll down to Windows Update, and double-click it.
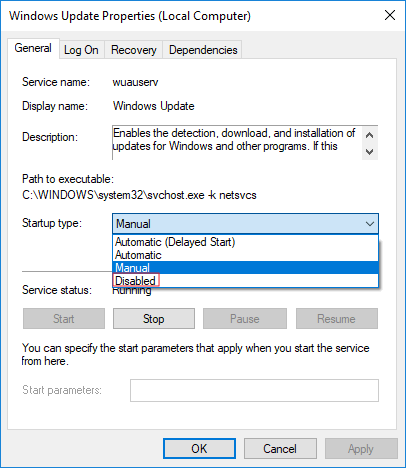
4. In Startup type, select “Disabled”. Then click “Apply” and “OK” to save the settings.
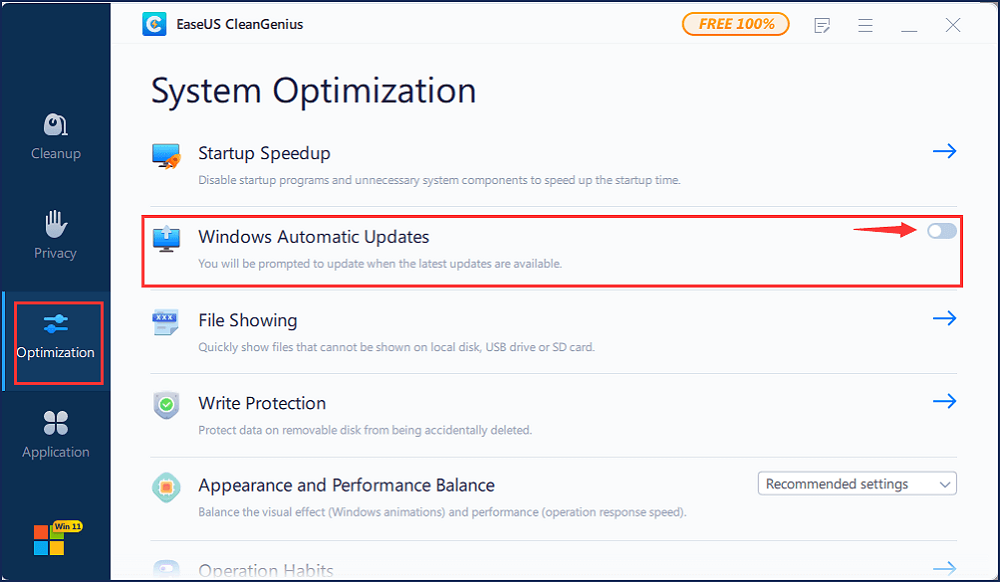
Do you prefer a one-click solution to disable the Windows automatic update feature? If so, get the versatile toolkit – EaseUS CleanGenius to help you. With it, you can disable/enable Windows Update, repair hard drives, remove/enable write-protection, and more within seconds.
To disable Windows Update:
Step 1. DOWNLOAD EaseUS CleanGenius for free and install it on your computer.
Step 2. Launch EaseUS CleanGenius and go to “Optimization”.
Step 3. The tool will detect the status of the Windows Update service automatically. If Windows Update is currently enabled, click the switch to stop the service.
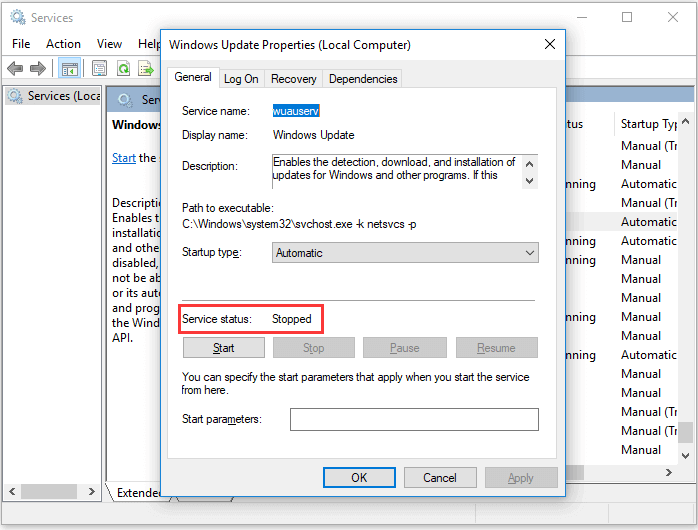
Step 4. If you want to check whether you have disabled the service automatically, go to “Start” > type “Services” > right-click “Services” and choose “Run as administrator”.
Step 5. In the list of services, find and right-click “Windows Update” > “Properties”. In the “Service status” section, you should see the service has been stopped.
You need to login in order to like this post: click here
YOU MIGHT ALSO LIKE

SUBSCRIBE TO OUR NEWSLETTER