In this official course, you will learn Real-time Animated Storytelling, allowing you to create your own 3D animations with cutting-edge technology. During the course, you will develop pre-visualization skills, learn to create an environment and props, animate characters, film a story, and refine your Scene with lighting and effects. As an artist and storyteller, you will learn how to leverage one of the most powerful new technologies to bring your ideas to life in real-time. As you complete the creative challenges and develop your own project, you’ll be able to share your new skills in our gallery and in your portfolio. Whether you’re a student who wants to be at the forefront of the entertainment industry, or a professional looking to upskill, by the end of this course you will have developed in-demand skills to make you stand out from the crowd. The 3D assets for this course were generously provided by our partner, Synty Studios, and are not for commercial use. If you would like to use any of the 3D assets from this course in commercial projects, please purchase one of the asset packs from Synty Studios’ Asset Store page.
Unit 1 – Getting Started
In Unit 1, we’ll go over downloading and installing the Unity Hub, the Unity Editor, and creating a Unity ID. We’ll also cover creating a new project in Unity’s Universal Render Pipeline (URP).
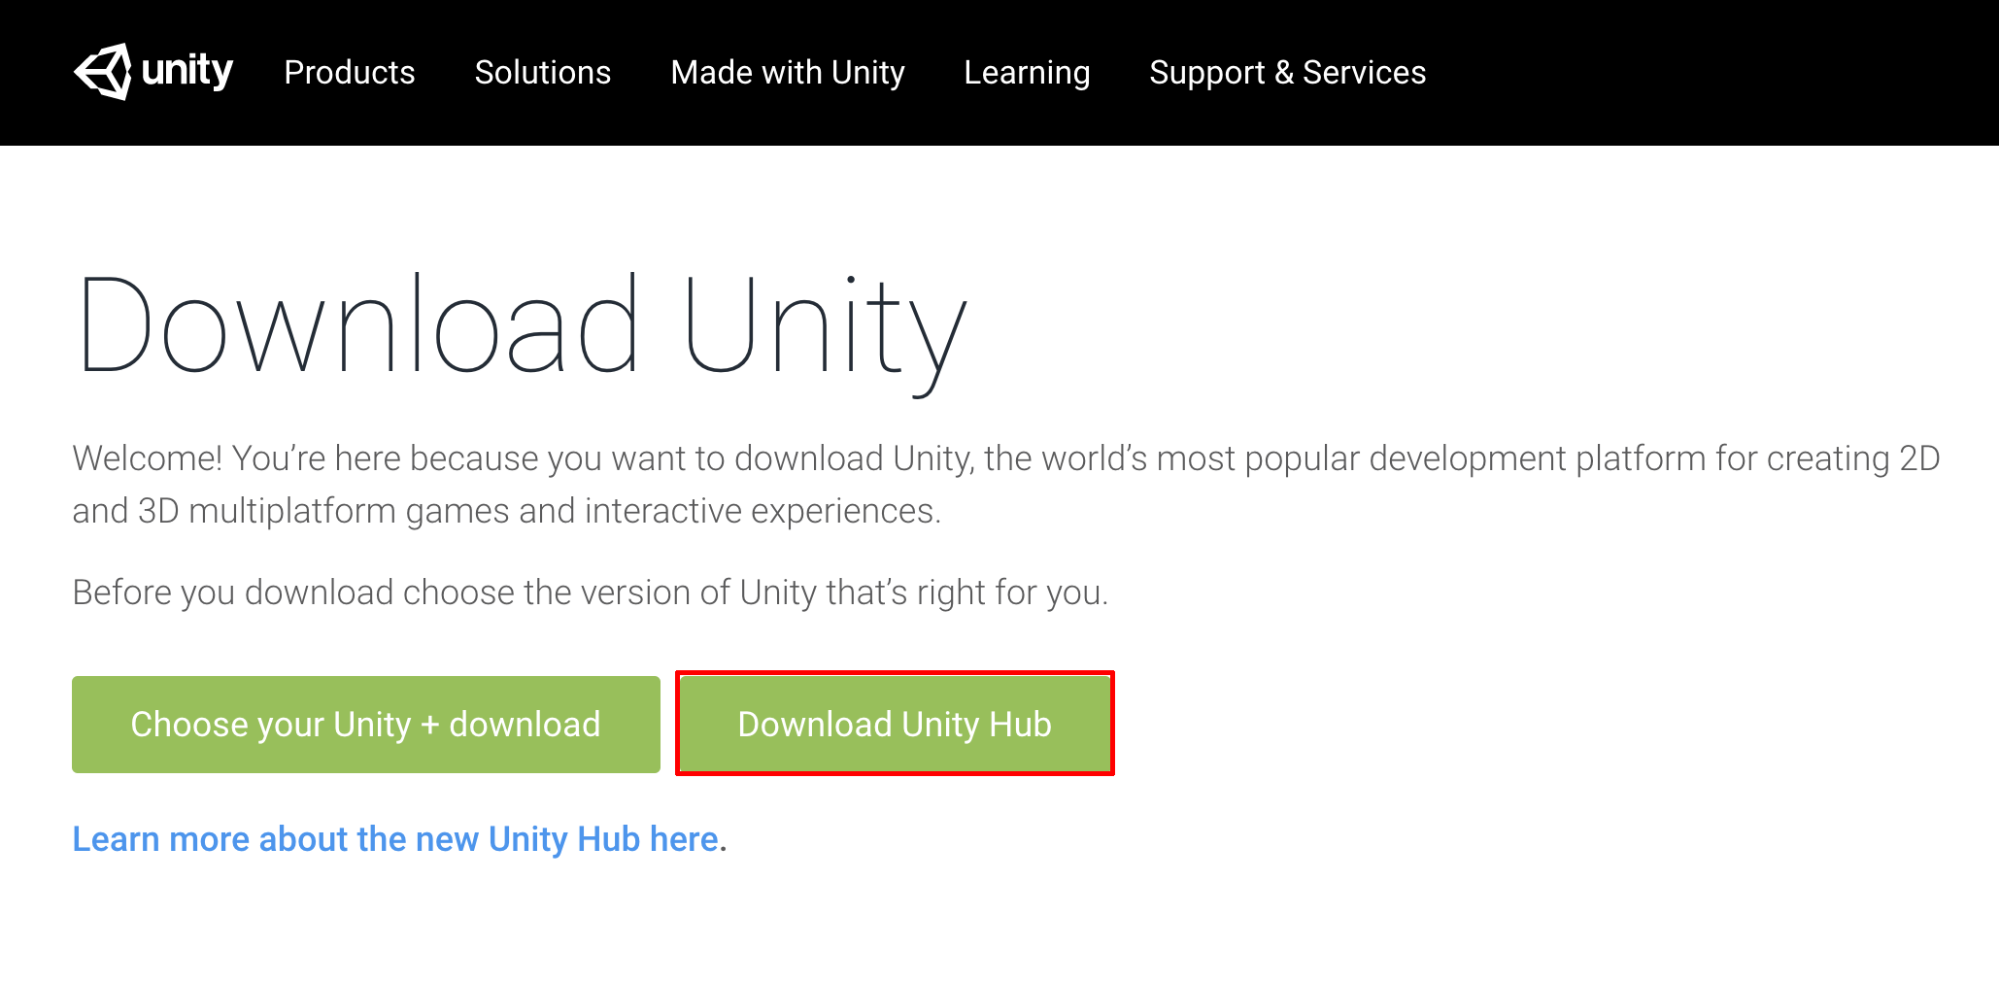
The Unity Hub is a useful tool for managing your projects and versions of Unity. If you haven’t already done so, you will need to download and install Unity. If you’re working in a computer lab with Unity installed, you can skip this step. 1. In a new tab, either Google: “Download Unity Hub” or go to: https://unity3d.com/get-unity/download (Figure 01).
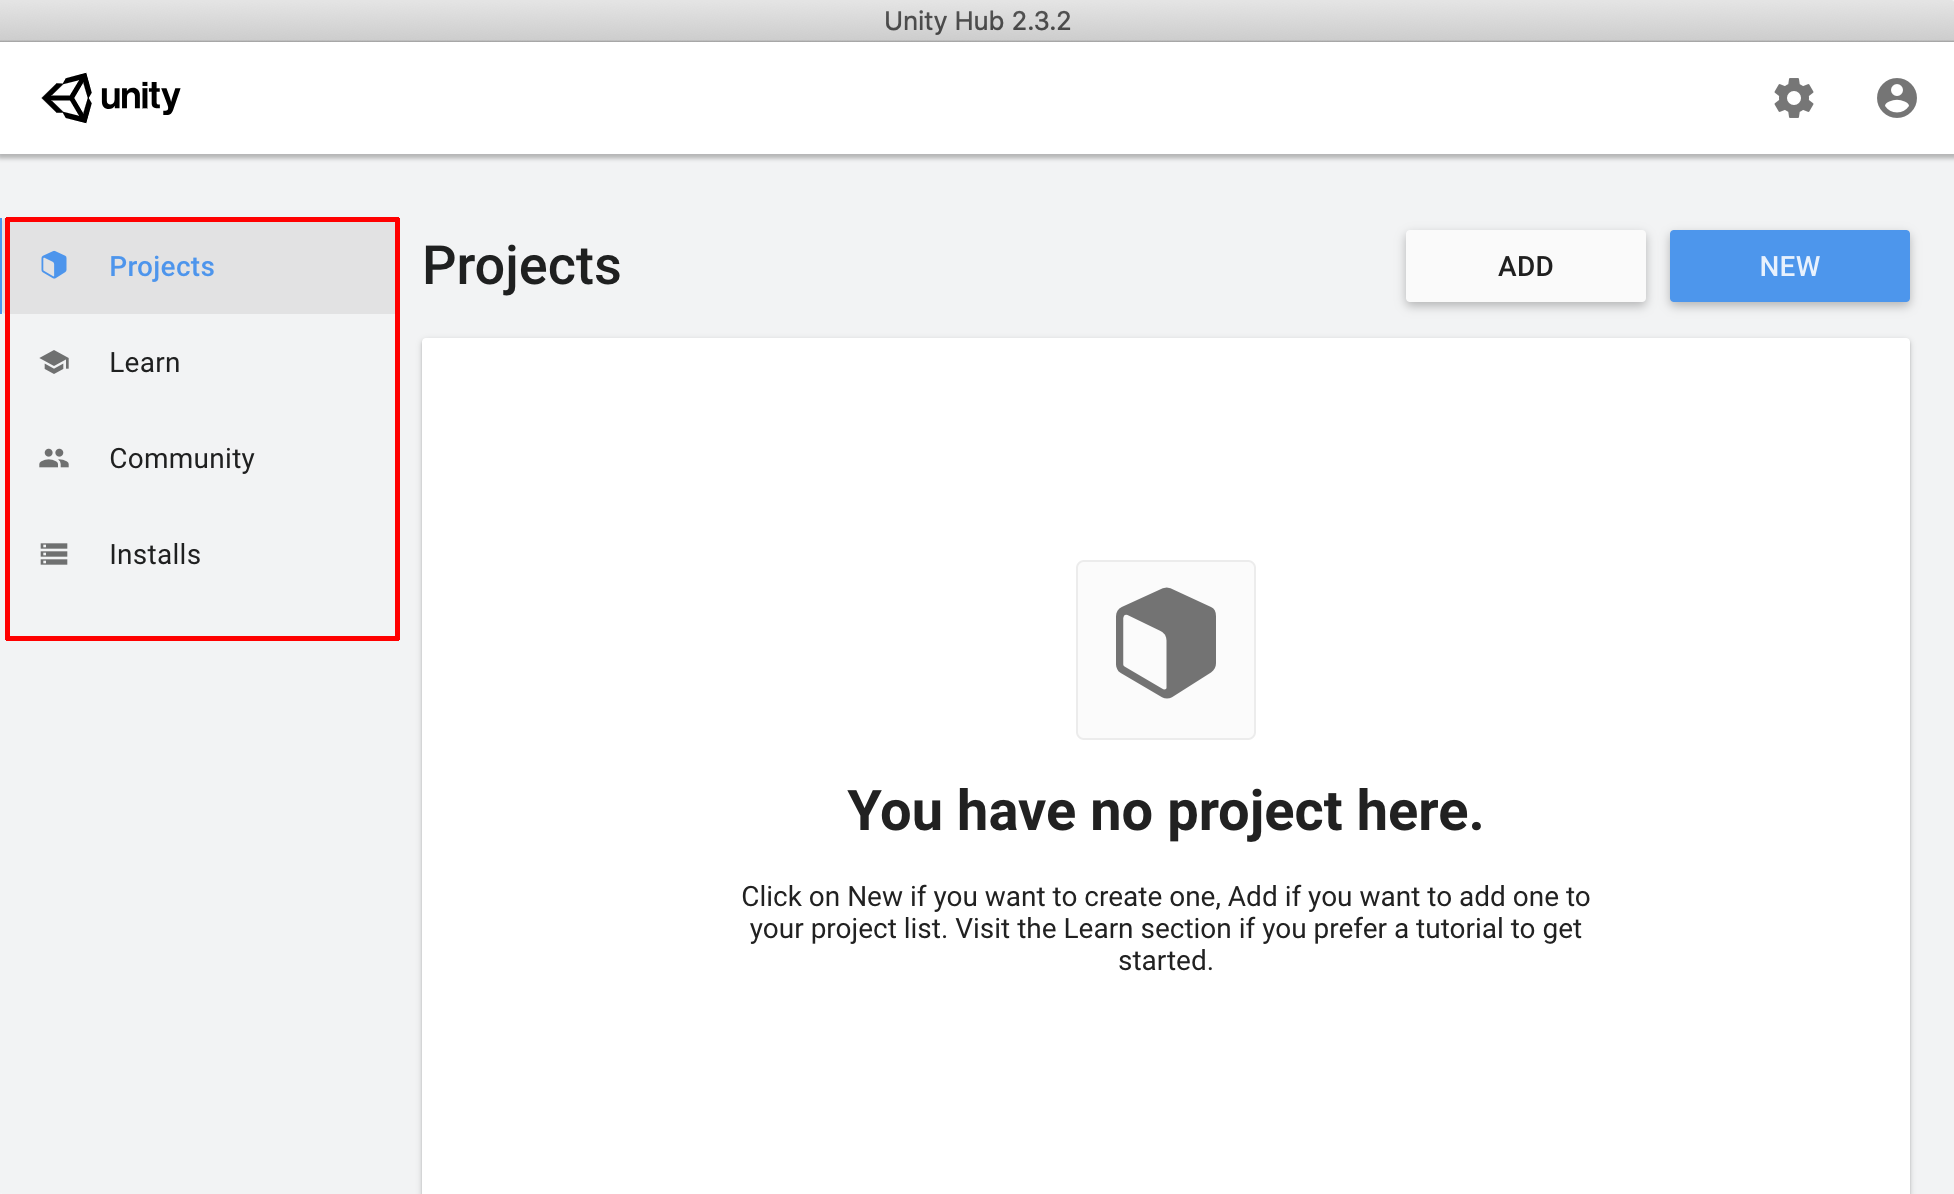
From your Downloads folder, double-click on the Unity Hub Setup file to begin the installation. 1. Agree to the Unity Terms of Service and follow the instructions to install the Unity Hub.2. Open Unity Hub. On the left side, select the categories to explore: Projects, Learn, Community, and Installs (Figure 02).
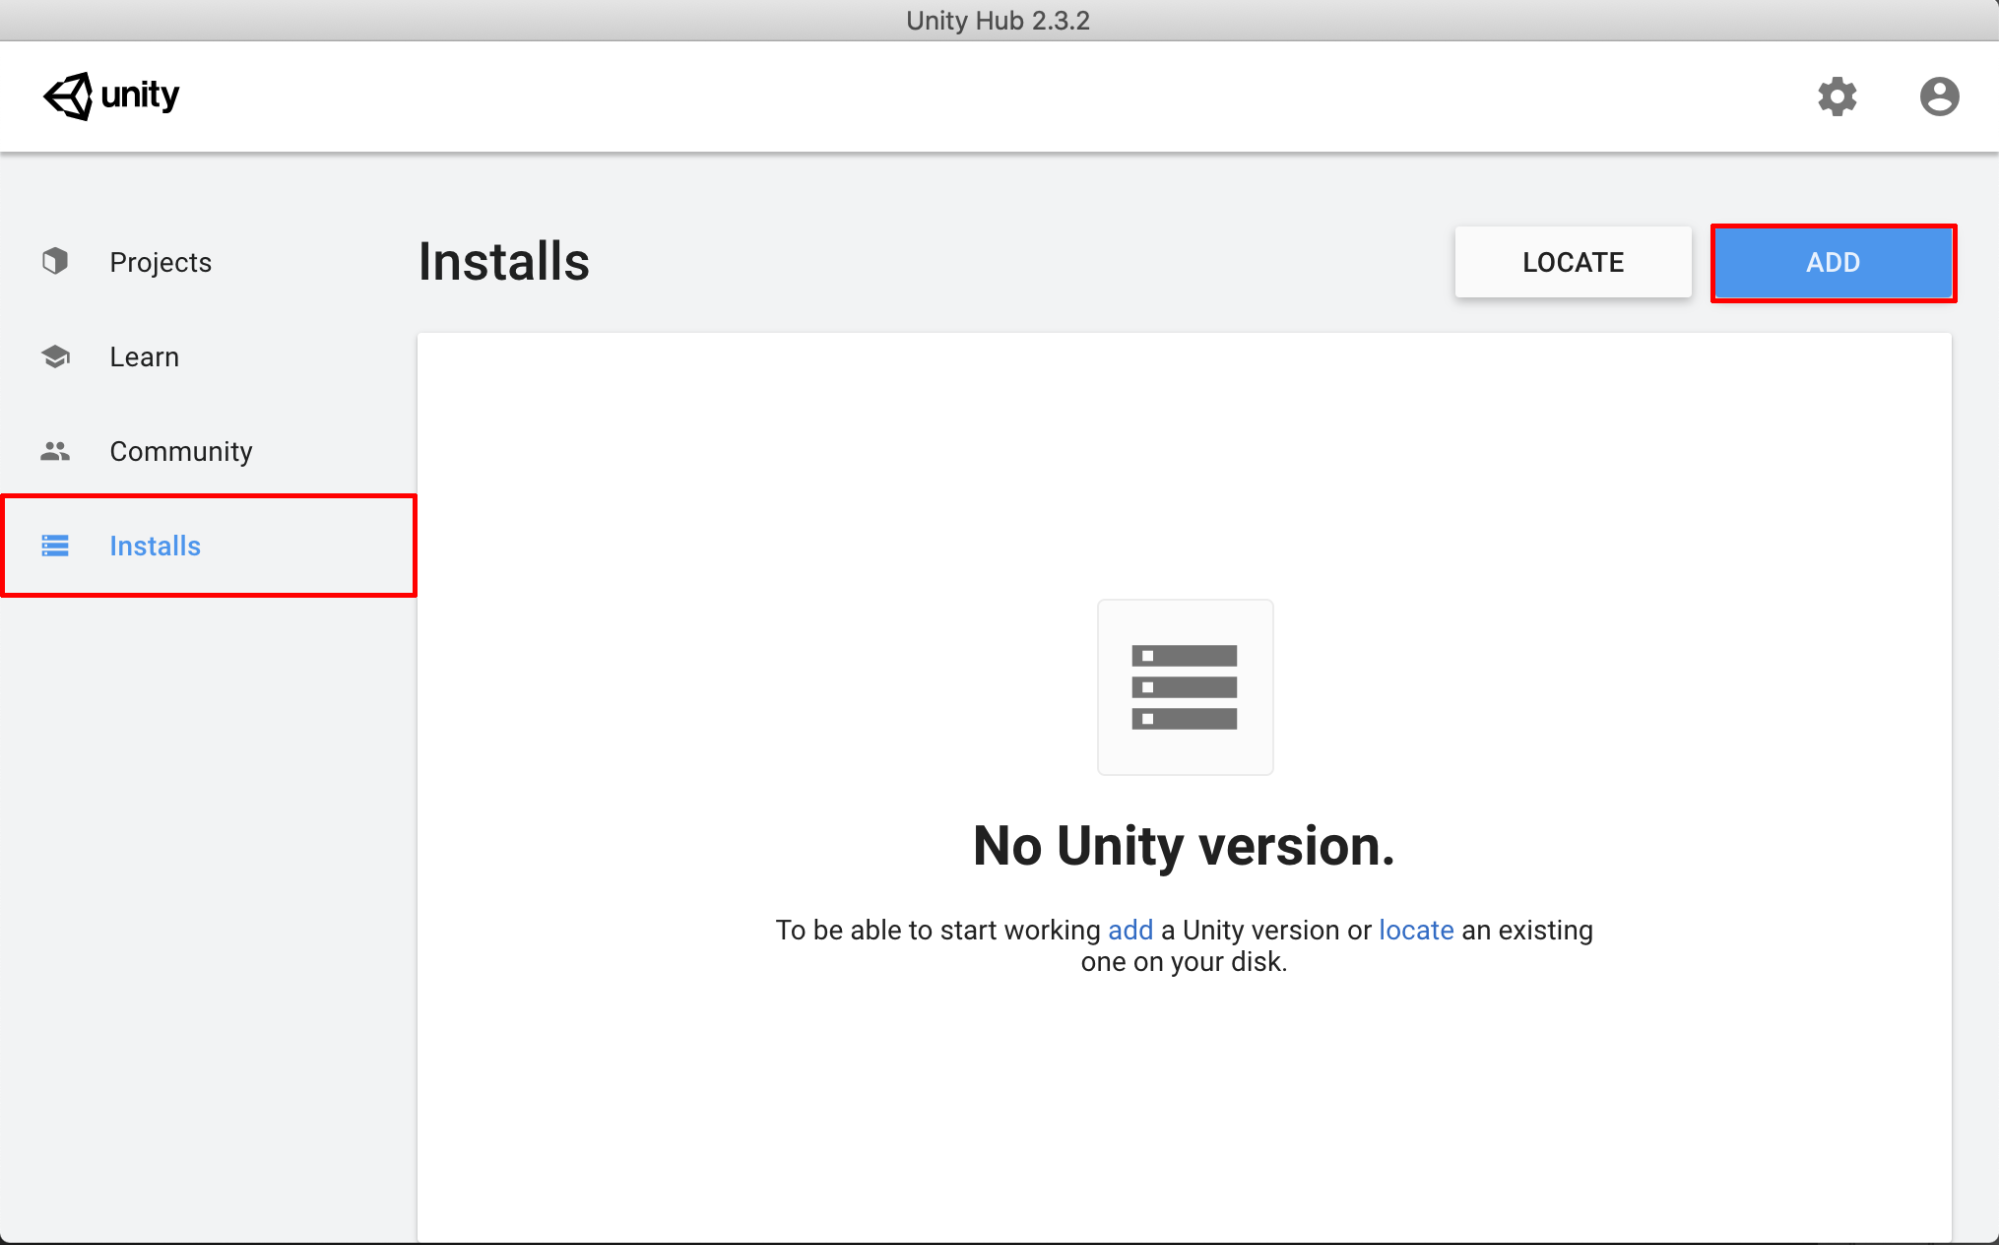
There are several versions of the Unity Editor to choose from. For this course, you’ll want to use the latest version of 2019, which is 2019.4. Don’t use a 2020 version because the course has not been tested on that version and you may get errors in your projects. 1. In the Installs tab, select Add to add a new Unity version (Figure 03).
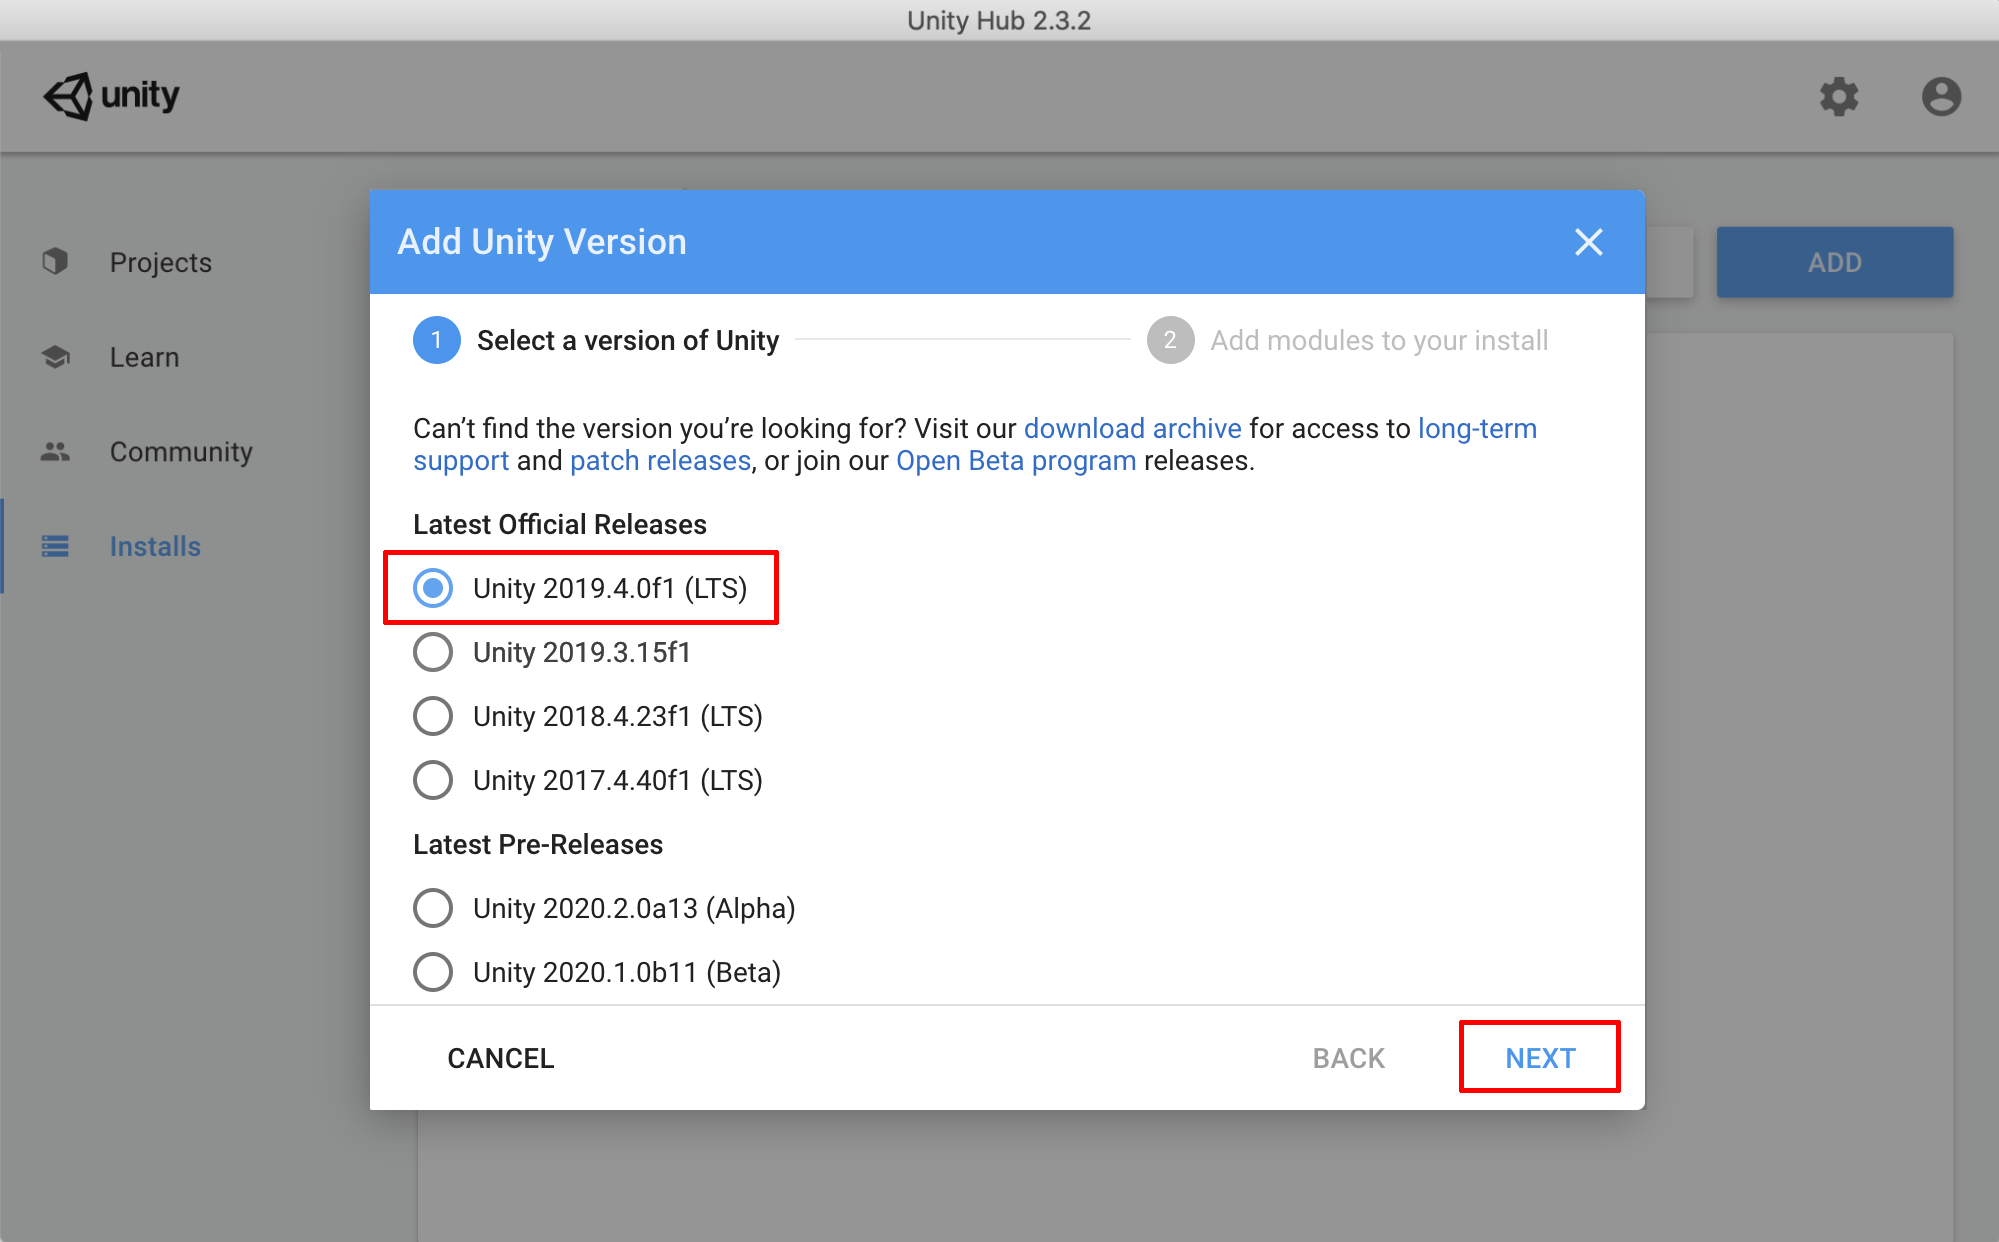
The Latest Official Release appears at the top of the list. As of this writing, it was 2019.4. You can easily upgrade projects to a newest version, but for this course, you should stick to the latest 2019.4 version. 2. Select Latest Official Release and then click Next (Figure 04).
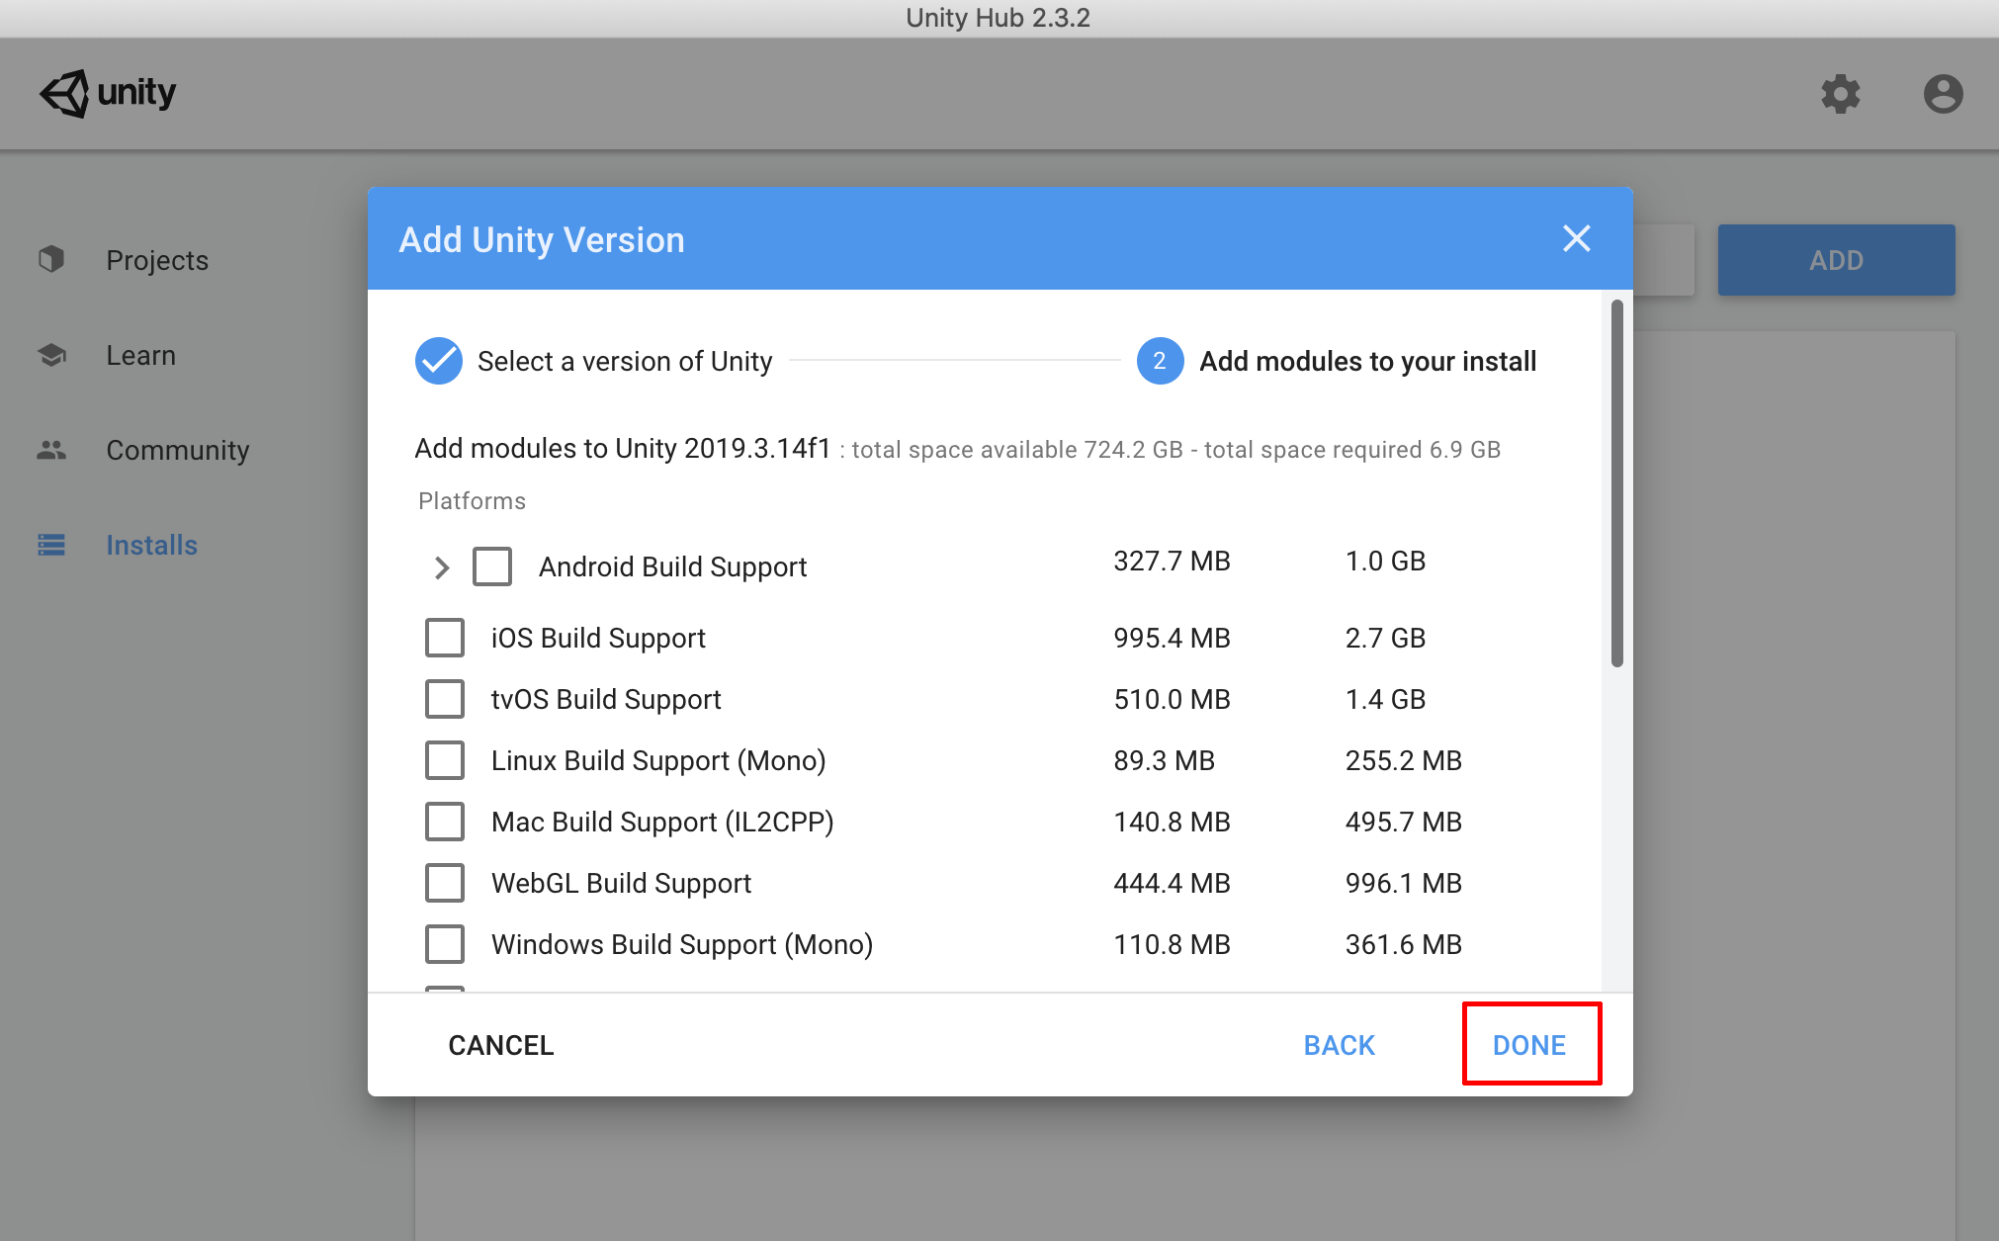
3. The next window gives you the option to add additional modules to your install. Leave the checkboxes unchecked for now. You can always add modules to your project later; however, they will not be required for the Realtime Animated Storytelling Project. Select Done (Figure 05). This will begin the download and installation process, which, depending on your internet and computer’s speed, could take between five and 30 minutes. While this is running in the background, you can proceed to the next step.
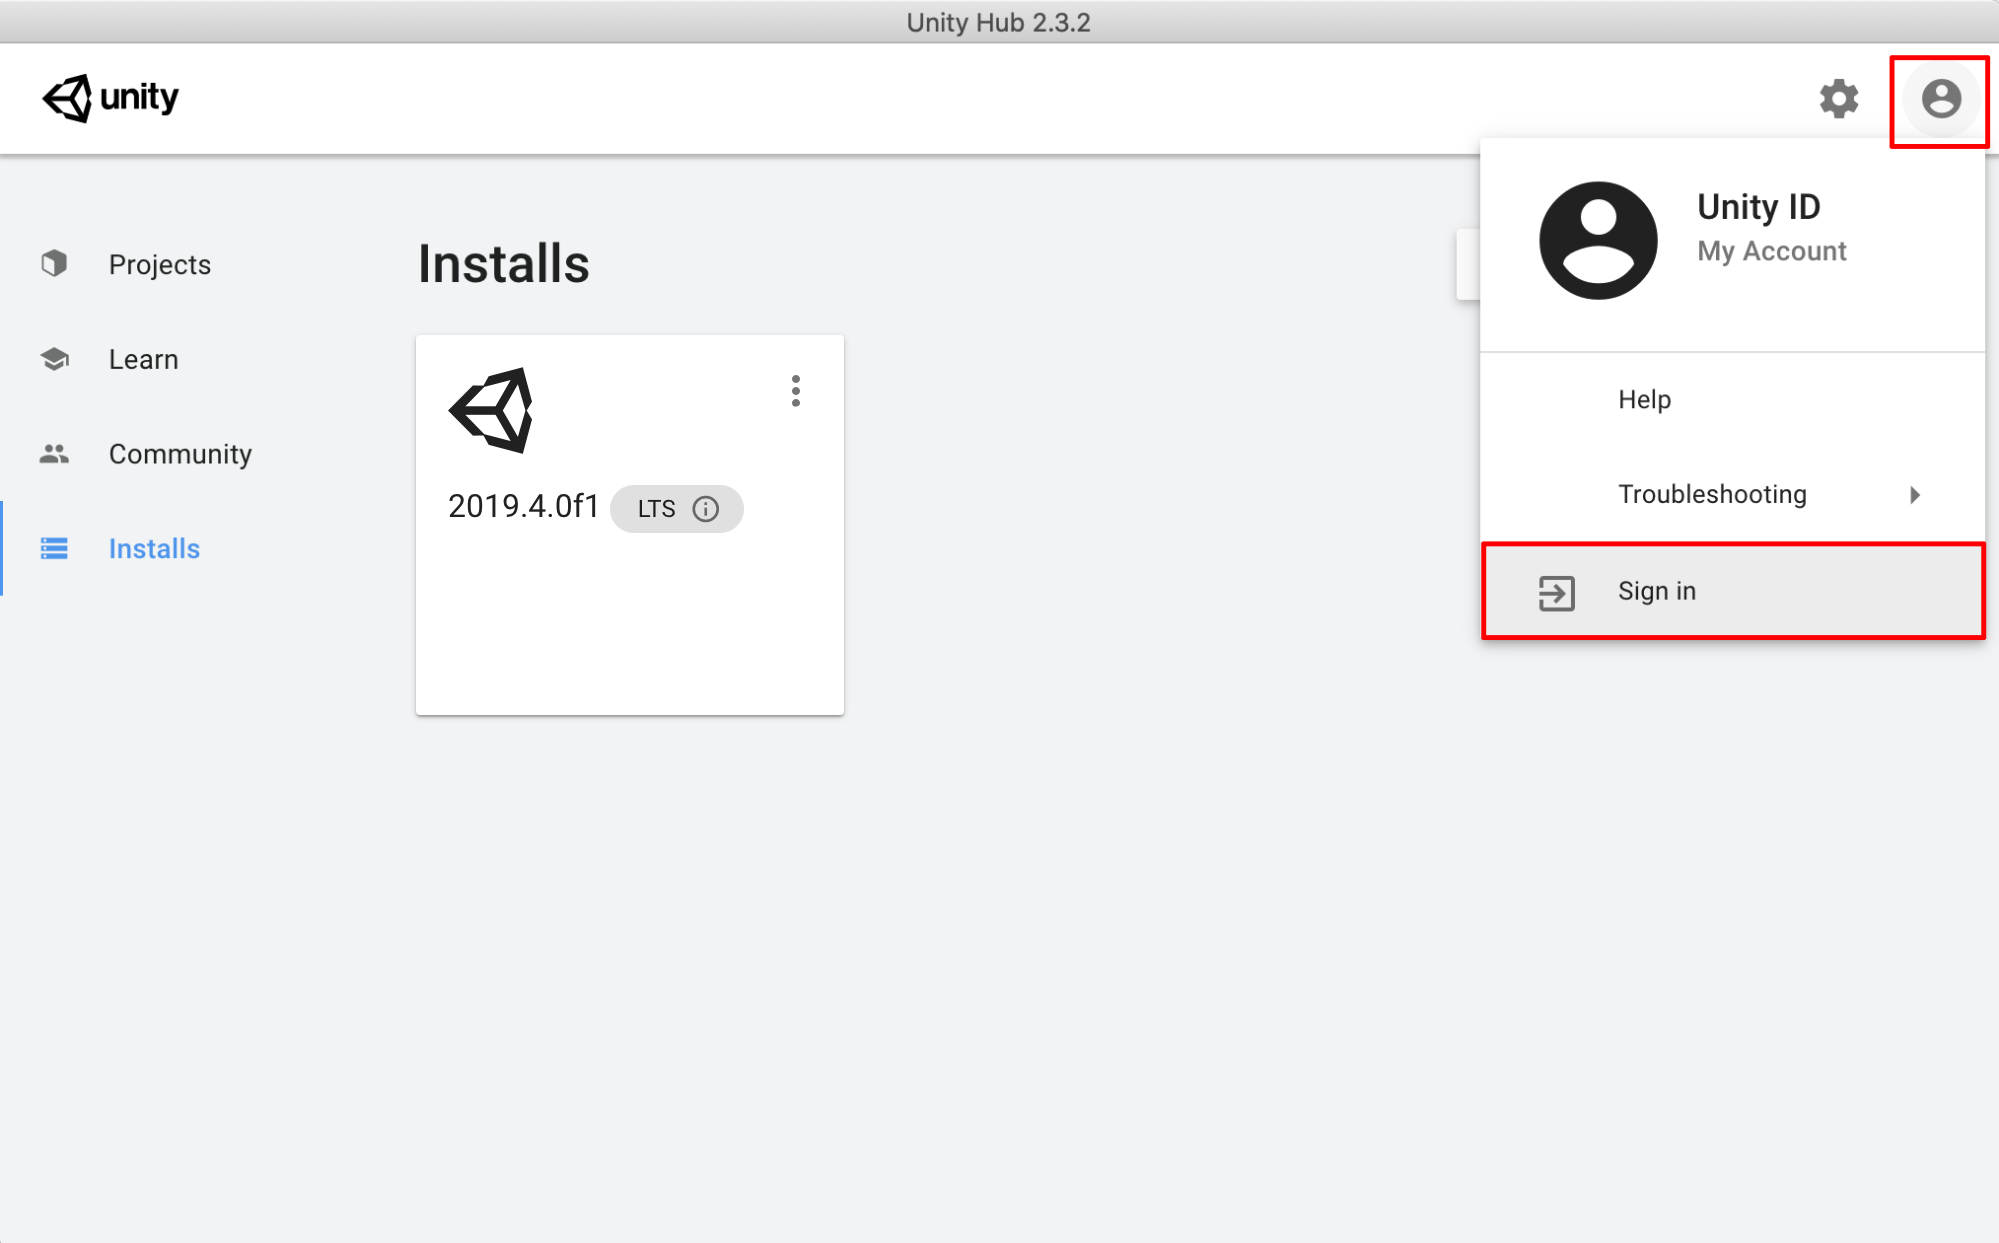
A Unity ID is your user account with Unity. It allows you to connect with your Unity teams and resources. Your Unity ID also securely controls access to Unity services for you and your team members. 1. Sign in by clicking the Account icon in the top right of the Unity Hub (Figure 06).
If you already have an account, sign in. Otherwise, you can sign in quickly through Google or Facebook or create a new Unity ID. After signing in, your account initials will appear in the top right of the Hub.
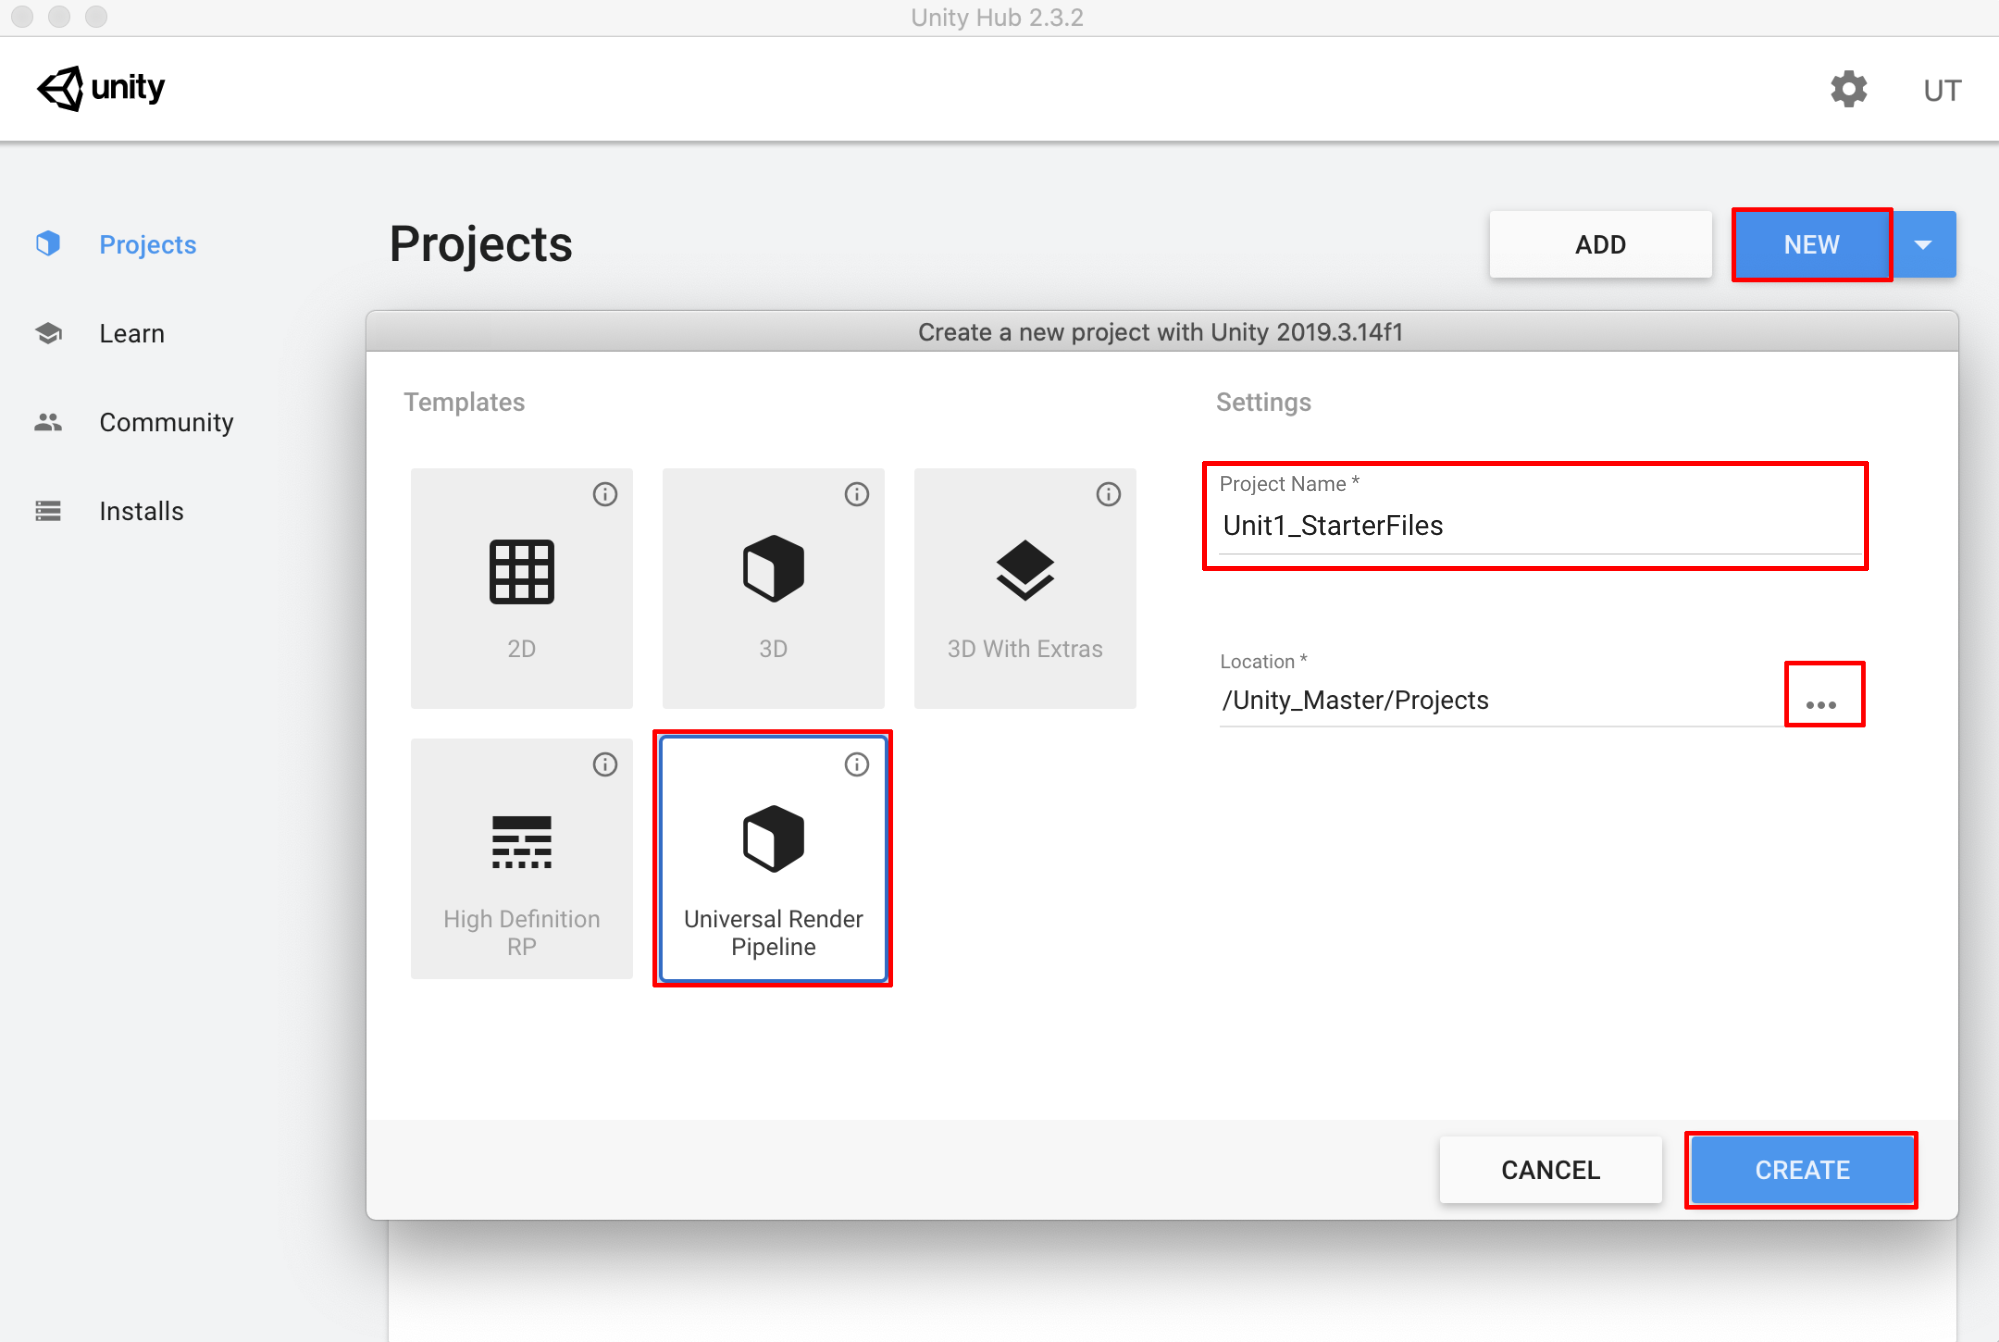
When you create a new project from the Unity Hub, new files and folders are added to a location you specify on your computer. These files include an Assets folder, library files, and the settings you will need to get started. When creating a new project, there are several templates available depending on what type of project you’re creating. For the Realtime Animated Storytelling Project, we will be using the Universal Render Pipeline (URP) template.1. With the Projects tab selected in the Unity Hub, click the New button at the top right of the window. If you have multiple versions of Unity installed, there will be a drop-down arrow next to the button that will allow you to select version 2019.4. Next, select the Universal Render Pipeline Template. Type in the project name. Let’s call it Unit1_StarterFiles. Next, specify the folder location by clicking on the Select Folder button which is represented by three dots. Lastly, select Create (Figure 01).
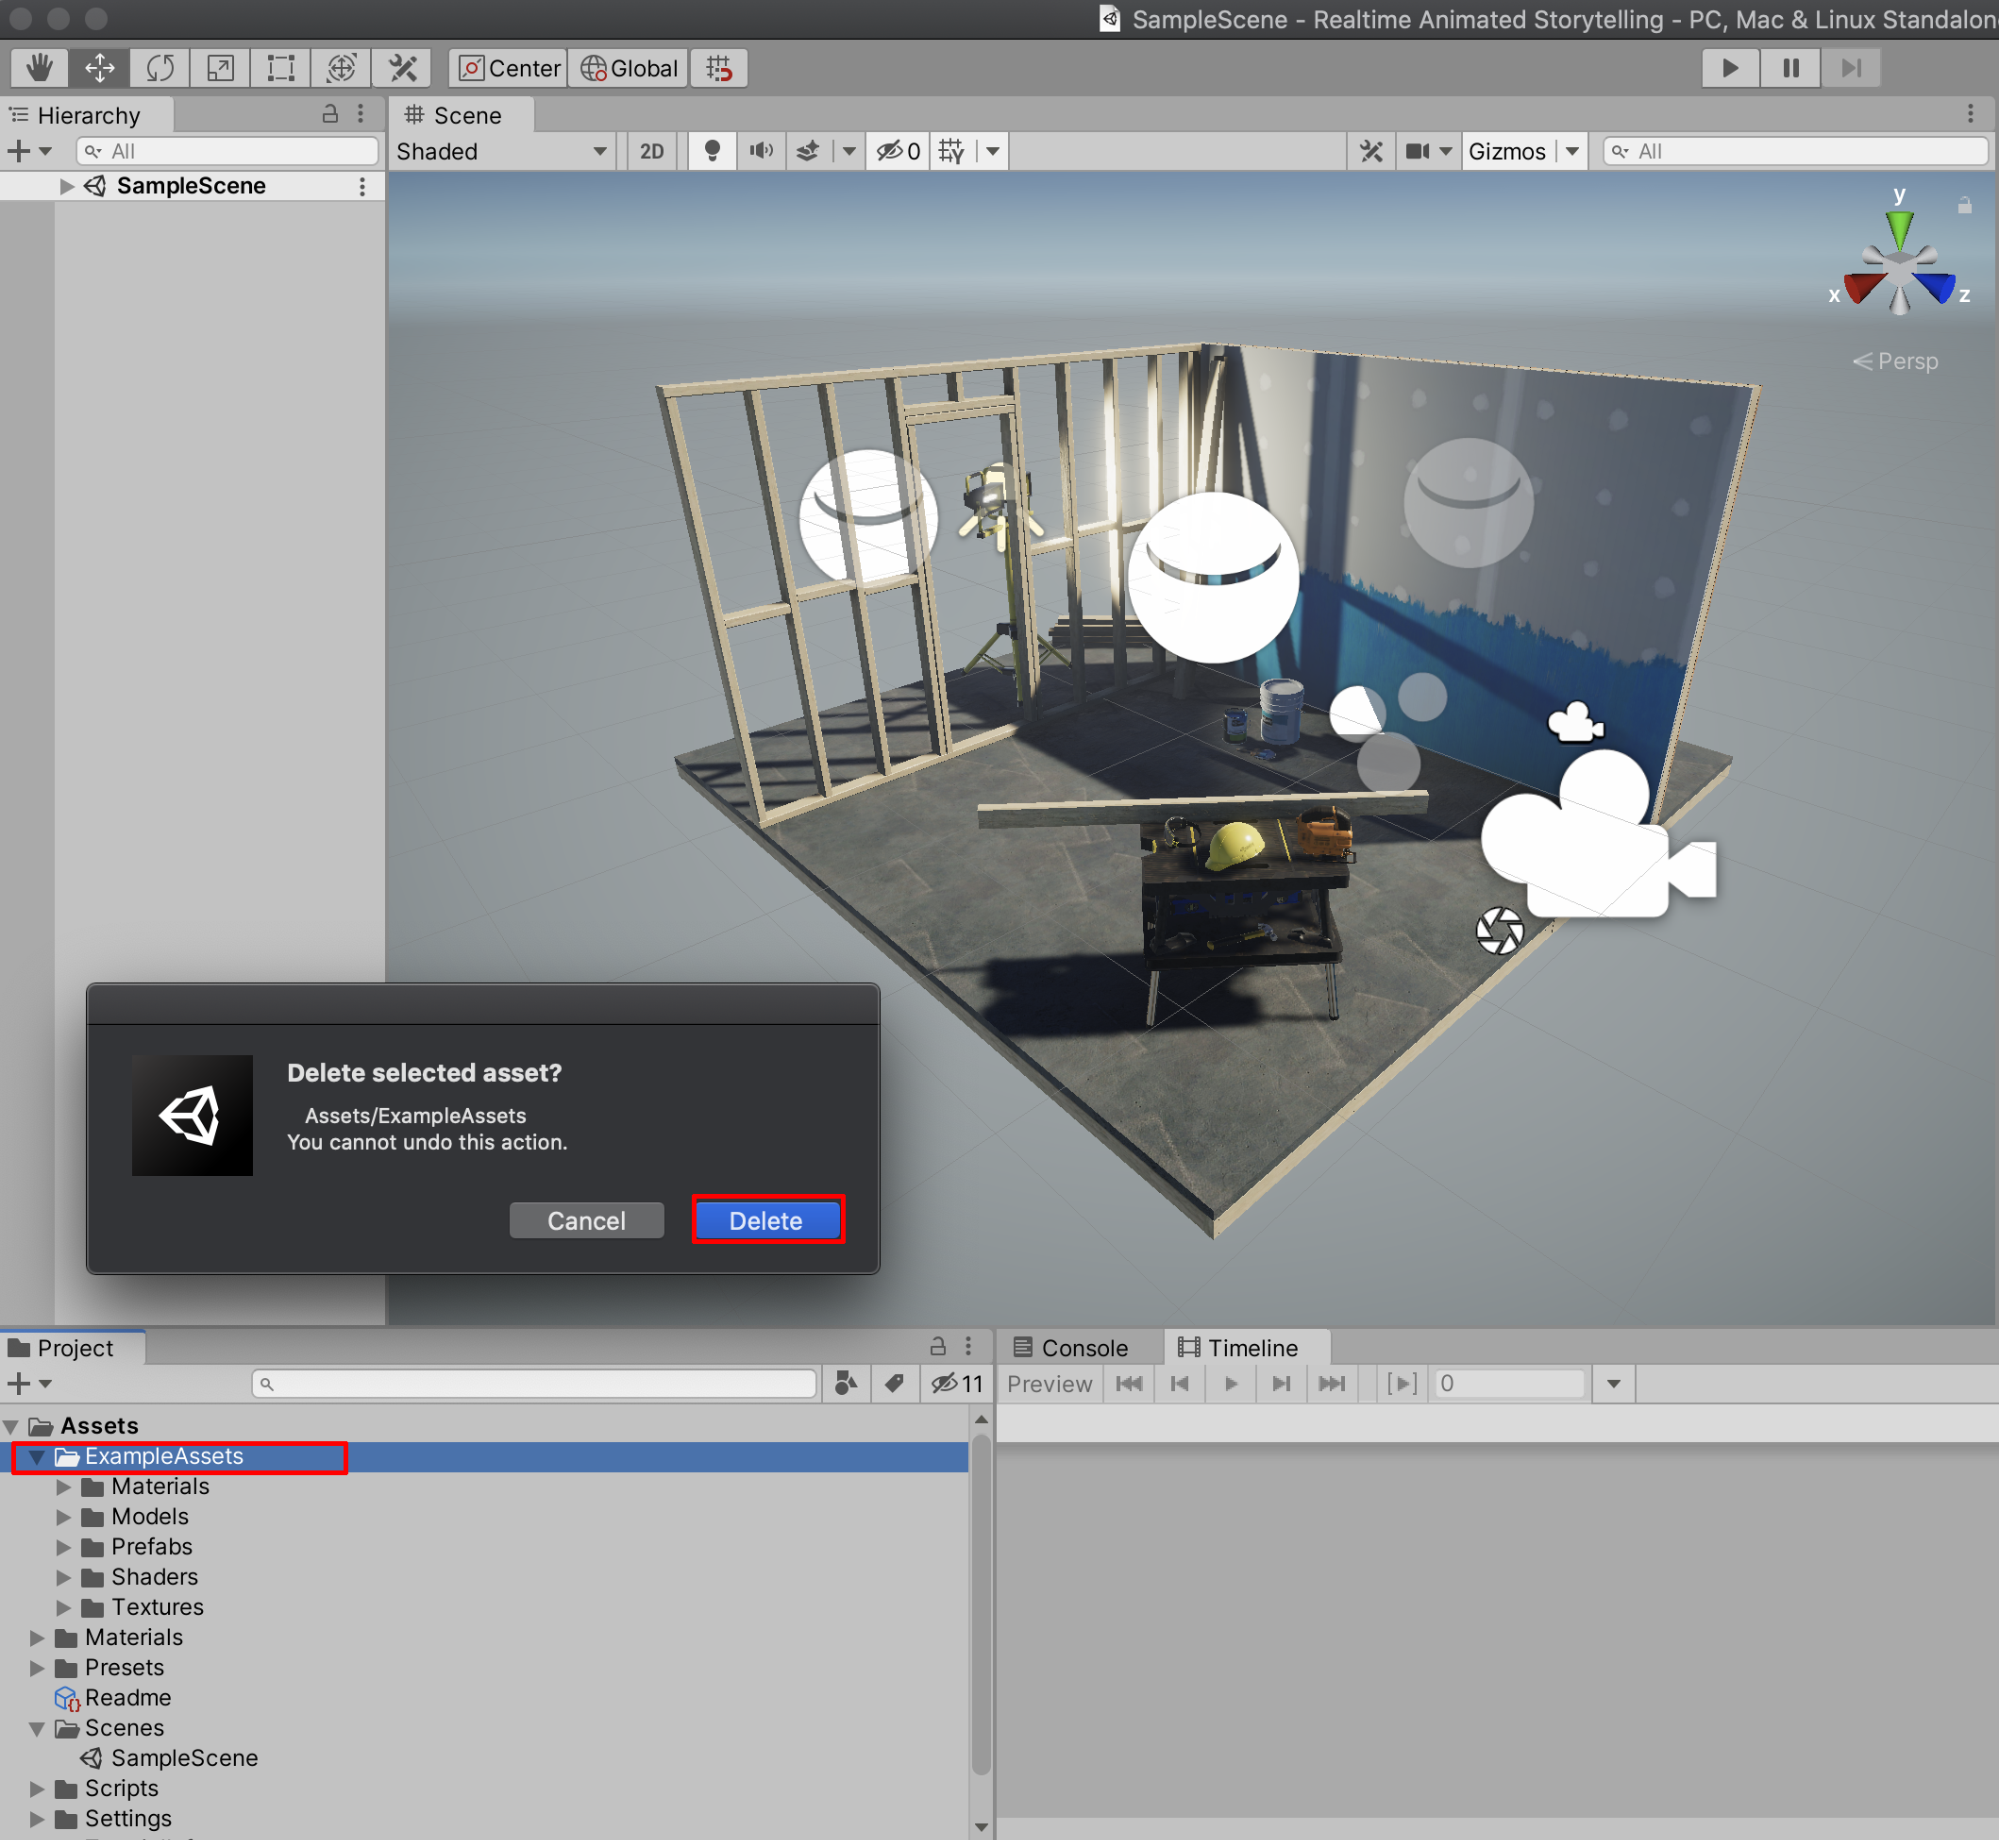
It may take a few minutes for the project to configure and open. When it opens for the first time, you’ll see a sample Scene containing a construction set with a workbench. We will delete this Scene as well as its associated folder. 2. In the Project window, you’ll see the project’s files and folders. With the ExampleAssets folder selected (under Assets), right-click and select Delete. Confirm to delete again in the popup window (Figure 02).
3. Create a new Scene by selecting File > New Scene. Don’t save any changes to the currently open SampleScene. 4. Save the new Scene by selecting File > Save As. Select the Scenes folder inside the Assets folder. Name the Scene Unit1 and select Save. 5. Next, delete the SampleScene file from the project. In the Project window, inside the Scenes folder, select SampleScene, right-click, and then select Delete. Congratulations! You’ve successfully installed the Unity Hub, the Unity Editor, signed in with a Unity ID, created a new URP project and saved a new empty Scene. In the next unit, we’ll build a city in that empty space!
See you next part…
You need to login in order to like this post: click here
YOU MIGHT ALSO LIKE

SUBSCRIBE TO OUR NEWSLETTER